
How to wear a shoulder brace depends on the type you’re using and what it’s needed for. We’ll help you figure that out and walk you through each kind. This guide comes in handy whether you’re recovering from an injury or in need of extra support.
How to Wear a Shoulder Brace (the Right Way)
There’s more to it than just slipping it on. This isn’t a step-by-step tutorial, but rather the basics that will help you wear it as it should be. Don’t worry; we’ll get into specifics later in the blog. But first:
- When the shoulder brace is being put on, do it slowly and with care. Most braces have a clear left and right side or adjustable straps. Follow those cues.
- The fit needs to be snug, not tight—just enough support to be felt without causing discomfort.
- Once the brace is on, wiggle your arm gently to see if the support stays put. If not, it probably needs adjusting. Check the straps or try refitting it so it fits better.
- Does it feel stretchy or uncomfortable against your skin? Wear a light T-shirt or base layer underneath.
Oh, and one last thing. Make sure your shoulder is clean and dry before putting the brace on. No sweat, dirt, or lotions left on the skin, as this may irritate, especially if you’ll be wearing it for a while.
Find the Right Shoulder Brace Fit for You
A shoulder brace isn’t a one-size-fits-all. Here’s a quick look at the most common styles and tips on slipping them on right.
Sling braces
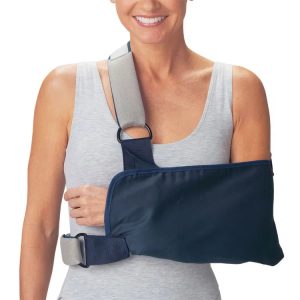
This type of support is more of a supportive pouch or loop form than a brace. One example is this shoulder immobiliser sling. It doesn’t squeeze or compress, but keeps your arms still and supported. Here’s how to wear it:
Slip your arm into the sling, elbow bent at 90 degrees.
- Bring the strap over your opposite shoulder. Your hand should rest slightly raised, not dangling low.
- You want it snug enough to support your arm, but not so tight that it cuts off circulation.
If your hand starts to feel cold or a bit numb, give the strap a little slack.
Best for: General shoulder immobilisation. Shoulder dislocations or fractures, rotator cuff and collarbone injuries, and post-surgery recovery.
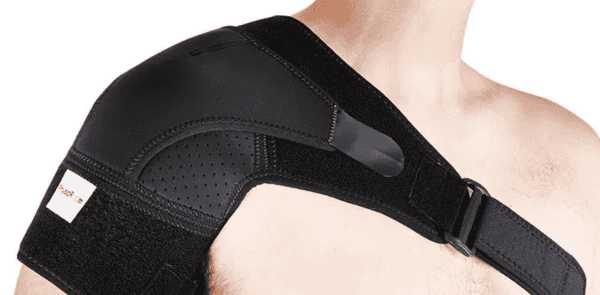
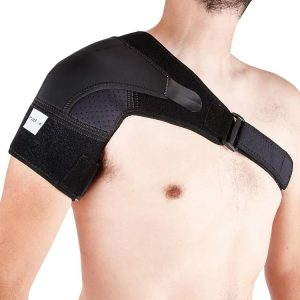
Compression braces
These have wrap-around designs around the shoulder joint to provide support and compression. This is how you put it on:
- Slide it on like a sleeve or fasten the straps the way it’s meant to go. Some with Velcro or tension straps. Adjust as needed.
- Aim for a firm and even fit, nothing digging in or riding up.
- See to it that the brace doesn’t limit your movement by lifting and rotating your arm carefully.
If all feels good, you’re all set to go!
Best for: Ongoing support during recovery. Mild sprains or strains, swelling or inflammation, and muscle fatigue or overuse.
Stabilising braces
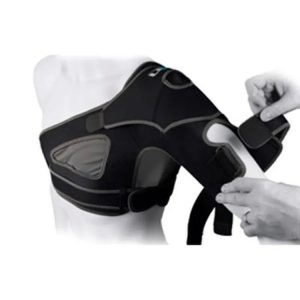
A shoulder stabilising brace often features firm straps or supports. This design holds the joint and stops it from moving too much.
For reference, take a look at this Ultimate Performance Advanced Shoulder Support Brace. It provides adjustable controlled stability and compression via retention support straps.
The best way to wear it is:
- Position the brace so the straps cross comfortably over your chest or back.
- Secure the straps without over-tightening them.
- Adjust as needed throughout the day to keep it comfortable and effective.
Best for: Shoulder dislocation or subluxation. Rotator cuff injuries, post-surgery recovery, and support during high-impact or contact sports.
Braces with ice pack holders
They have a special shoulder ice pack pocket where you can put in a cold pack. This helps keep your shoulder cool while still getting support from the brace.
Feel free to follow these steps for putting the brace on, unless you’ve got instructions to follow. When it comes to the ice pack, make sure it’s chilled but not rock hard. It should rest comfortably over the sore area.
Best for: Strains, sprains, or swelling. Ongoing inflammation or pain relief after activity. Managing flare-ups from tendonitis or bursitis.
Hopefully, this guide has given you a clearer idea of what each brace is for and how to make it work for you day to day. We also recommend checking with your GP or physio first to get the correct type of support.