
Injury prevention and optimal performance are crucial in sports and physical activities. One often overlooked but essential tool in this field is pre-taping underwrap.
Understanding how to use it properly can make a world of difference. Whether you’re an athlete, a fitness enthusiast, or someone recovering from an injury, this guide got you covered! Keep reading to explore the ins and outs of using pre-taping underwrap.
Understanding Pre-Taping Underwrap

Pre-taping underwrap is applied to the skin before the application of athletic tape. Its purpose is twofold: 1.) to provide a protective barrier between the skin and the tape, and 2.) to enhance adhesion.
Choosing the right underwrap is essential to meet your specific needs. Commonly used materials include the following:
- Foam
- Non-woven fabric
- Elastic materials (e.g., cotton or polyester)
Foam varieties are ideal for protecting sensitive skin or providing extra cushioning. Non-woven fabric types are suitable for breathability and moisture management. Elastic offers a compressive fit for joints or areas requiring extra support.
Preparing for Application
Before applying the pre-taping underwrap, ensure the skin is clean and dry. Cleaning the skin properly involves the following steps:
- Start by gently washing the area with mild soap and warm water. Avoid using harsh or scented soaps that can potentially irritate the skin.
- Use a clean towel to pat the area dry. Avoid rubbing, as it can cause friction and potentially damage the skin.
- If there is any residue or oils on the skin, you can use a mild alcohol wipe or an alcohol-based cleanser to remove them. But be cautious not to overuse alcohol-based products, as they can dry out the skin overly.
After cleaning, make sure the skin is completely dry before applying the underwrap. Here are some tips for drying the skin effectively:
- Allow the skin to air dry naturally. Avoid using a hairdryer or other heat sources, as they can cause excessive dryness or even burns.
- If time is a constraint, gently pat the skin dry with a clean towel. Ensure no moisture or dampness is remaining.
By following these steps, you create an ideal surface for the underwrap to adhere to.
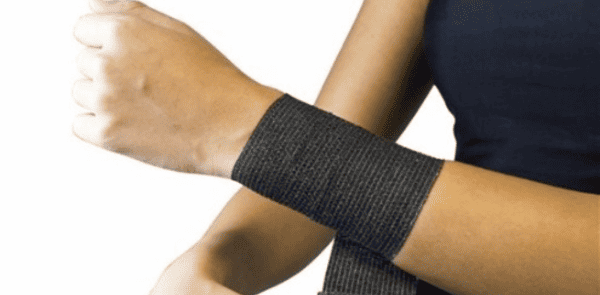
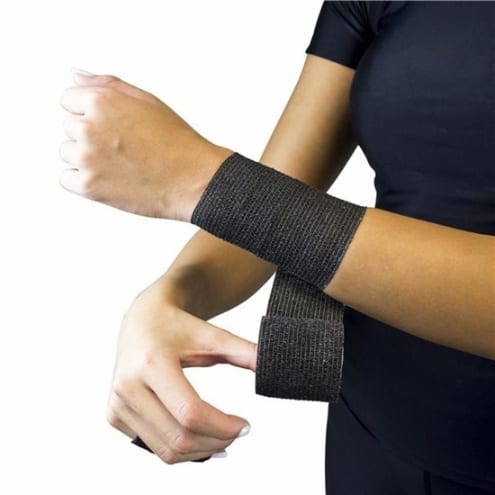
Step-by-Step Application Process
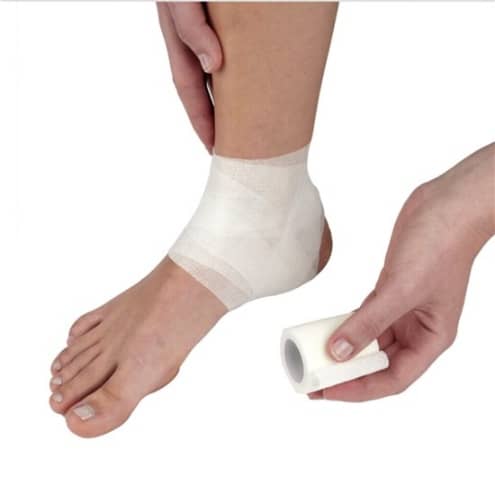
1. Choose the right width and length of underwrap
The underwrap must be wide enough to cover the intended area without overlapping. Generally, a width of 2-3 inches works well. Cut an appropriate length that allows complete coverage.
2. Hold the underwrap correctly for smooth application
Hold the underwrap gently, ensuring it is taut but not overly stretched. Avoid crumpling or twisting the underwrap, as it can create uneven application.
3. Start the wrap at the desired location
Begin the wrap slightly below or above the target area, depending on your taping needs. Secure the initial end of the underwrap by applying light pressure for a few seconds. This helps ensure it sticks to the skin.
4. Proper tension during application
Maintain consistent tension throughout the wrapping process. Avoid wrapping too tightly, as it can impede circulation or cause discomfort. Conversely, wrapping too loosely may result in inadequate support.
5. Overlap the previous layer to ensure secure coverage
With each rotation, overlap the previous layer by approximately 50%. This technique helps create a secure foundation for the next taping process.
6. End the wrap with a secure finish
Once the desired area is adequately covered, secure the end of the underwrap with a gentle press. Avoid excessive tension at the finishing point to prevent discomfort.
Removal and Post-Taping Care
Follow these steps to remove it safely:
- Begin by finding the starting edge of the underwrap. Slowly peel it back. Apply gentle pressure on the skin beneath to minimise any discomfort. Avoid pulling or tugging forcefully, as it can cause skin irritation.
- Continue peeling the underwrap carefully, moving in the opposite direction of the wrap. If you encounter any resistance or sticking, use a small amount of water or mild soap to loosen the adhesive.
- If the underwrap is adhered or stuck to the skin, apply a small amount of baby oil or adhesive remover. Gently rub the oil or remover on the affected area. Allow it to sit for a few minutes before attempting to remove the underwrap again.
After removing the underwrap, consider the following steps:
- Use mild soap and warm water to wash the taped area gently. Remove any residue or adhesive that might remain. Pat the skin dry with a clean towel afterwards.
- Apply a gentle, non-irritating moisturiser to the skin. Doing so helps replenish any lost moisture and promote its health. Choose a moisturiser that suits your skin type and preferences.
Round-up
Using pre-taping underwrap is a game-changer when it comes to:
- injury prevention
- performance optimisation
- overall comfort during physical activities
Remember the importance of clean and dry skin. Plus, the steps for applying and removing the underwrap with care. Post-taping care is equally vital for maintaining healthy skin.