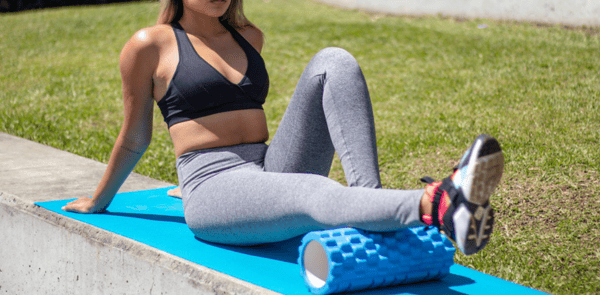
Here are the best foam roller exercises to get every major muscle group firing! Most of these self-massage moves are also great for increasing blood circulation and flexibility—and even better, they can help alleviate trigger points.
Let’s start releasing those knots in your muscles, shall we?
Thoracic Spine Roll
Foam rolling your T-spine does your upper body a real favour, especially after sitting for hours. This exercise targets your upper back and the area between your shoulder blades. If done right, it can loosen things up.
Here’s how to do it:
- Lie on your back with the foam roller placed horizontally under your upper back (between shoulder blades).
- Support your head with your hands and lift your hips off the floor.
- Slowly roll from your mid-back to below your neck, avoiding the neck area itself.
- Pause and hold for 20 to 30 seconds when you hit a tight spot.
Do this for 1 to 2 minutes, rolling the foam back and forth over your target area.
Glute Roll
This one’s perfect if you’ve got tight glutes, a.k.a. the muscles in your bum. Give them a roll if you spend much time sitting or doing aerobic exercises. It’s a pretty easy stretch, though you might need a bit of balance.
- Sit on the foam roller and cross your right ankle over your left knee.
- Lean slightly towards the right side and roll slowly over the glute.
- Pause and hold when you find a sore spot.
- Switch sides.
Spend about 1 to 2 minutes on each side, pausing for 20 to 30 seconds on any tight spots.
IT Band Roll
Though the IT band isn’t a muscle, rolling this area can help release tension in the TFL. It activates your outer thigh, particularly the TFL and the IT band itself.
Do it this way:
- Lie on your side with the foam roller under your outer thigh.
- Use your forearm and opposite leg to control how much pressure you’re putting on.
- Roll slowly from your hip down to just above the knee.
- Focus on any tender points, but avoid rolling directly on the knee.
Note: The IT bands are fibrous tissues that run along the outside of your leg, from the hip to the knee.
More foam roller exercises to get the blood moving and prep your body for stretching:
Calf Roll
Don’t let the pulling feeling in your calf muscles sit too long, and let foam rolling release it. Also, make it a habit to add this to your pre-workout stretching, as this can help improve your range of motion.
Give this a go:
- Sit with your legs extended and the foam roller under your calves.
- Use your hands to lift your hips slightly off the floor.
- Start near your ankles and work your way up towards the back of your knee.
- Cross one leg over the other for more pressure if needed.
Hold this position for 1 to 2 minutes per leg.
Quads Roll
The quad foam roll is a great stretch to boost your quadriceps or quads’ flexibility. It can also be used as a warm-up or cool-down exercise. And if you’re feeling stiffness in the front of your thigh, this exercise can work that out.
Try it this way:
- Lie face down with the roller under your thighs.
- Prop yourself up on your forearms.
- Guide the roller from your hips to the top of your knees.
- Pause on tight spots. Do this for around 2 minutes in total, or 1 minute per leg.
Lats Roll
Foam rolling the lats can help improve posture and increase workout performance. The lats (latissimus dorsi) are one of the largest muscles in the upper body. So when they’re under pressure, it can affect shoulder mobility and posture.
Relax those muscles and give this a go:
- Lie on your side with the roller under your armpit, arm extended overhead.
- Move the roller under your armpit and roll down to the middle of your back.
- Keep it slow and controlled, as this one can be a bit intense.
Do these steps for 1 minute per side.
Remember, foam rolling should feel uncomfortable, but not painful. Take it slow and listen to your body. If something doesn’t feel right, ease off. And don’t forget your non slip gym mat for extra comfort when doing these foam roller exercises!


