So you’ve pulled your hamstring, you’re in pain and you want to get back to playing the sport you enjoy as quickly, as safely and as healthily as possible.
Well you came to the right place; at least here we won’t get bogged down in discussions about what colour a dress is, the workings of the contrast button on your computer or just how amazing a piece of clothing really isn’t!
Here we deal with sports injury prevention and rehabilitation, so put the multi-coloured dresses to one side for just a moment and let’s get involved in something else that can often be as black and blue as that white and gold dress is supposed to be.
In this second part of my hamstring strain investigation we are going to take a look at the techniques you can use to get back to training in the safest way possible, what you can do to strengthen and maintain the aerobic fitness of your hamstring during your rehabilitation and how best to prevent further injury in the future.

Rehabilitation & Treatment
The healing and treatment of hamstring strains can include any methods that are used to aid the healing process, these include hot and cold therapy, sports massage and electrotherapy techniques, but most certainly don’t involve you saying that it’ll be fine if I just carry on as normal.
It is important to remember that all people, and therefore their injuries, are different. Your rehabilitation is dependent on a number of factors including the severity of the injury, your overall fitness and the natural powers of your recovery.
So even though you may have seen your mate Trevor make a miraculous recovery from his grade two hamstring strain and start running within three weeks, don’t think that it will be the same for you, and definitely don’t make the mistake of thinking that you are invincible enough to just put your pain to one side and power on through (I was on crutches for the best part of 6 weeks because of the confidence I had in my own ability to handle pain and recover quickly).
Never again.
The best, and safest, course of action is to follow what your doctor or physiotherapist has advised you to do and maybe make a note of what the professionals out there recommend, but remember, I am far from a professional (as my 6 weeks on crutches highlights), so donִ shoot the messenger.
Shall we begin?

Stretching Exercises
As I have said, as each athlete is different, it is virtually impossible to put a timescale on when certain exercises should be performed during your recovery, so following this step-by-step approach should be done as-and-when each individual feels comfortable to move to the next stage and not to any specific timescale; everybody recovers in their own time and you֬ll know when yours is. If you need supports to help with your hamstring injury, browse PhysioRoom.com for the best hamstring supports.
Stage One Thou Shall Not Stretch!
Amazingly, there is no stretching in stage one of stretching. The simple fact is that during the acute stage Рimmediately following a hamstring injury Рno stretching should be done whatsoever (trust me I know) as you will most certainly do more harm than good.
As I said in my last blog, you should employ the Protection Rest Ice Compression Elevation (PRICE) principle to try and limit any muscle damage in the initial stages.
The length of this stage depends upon the severity and grade of your injury, but should normally last around 3-4 days. When normal everyday activities such as walking are pain free, you can then move on to more advanced and challenging stretches safely.
Note – (If your problems persist after 3-4 days it is best to seek medical advice if you haven’t already.)

Stage Two РBasic Stretches
Straight Leg Stretches
When you feel no pain doing normal activities, like taking the dog for a walk or going up stairs, straight leg hamstring stretching is safe to begin.
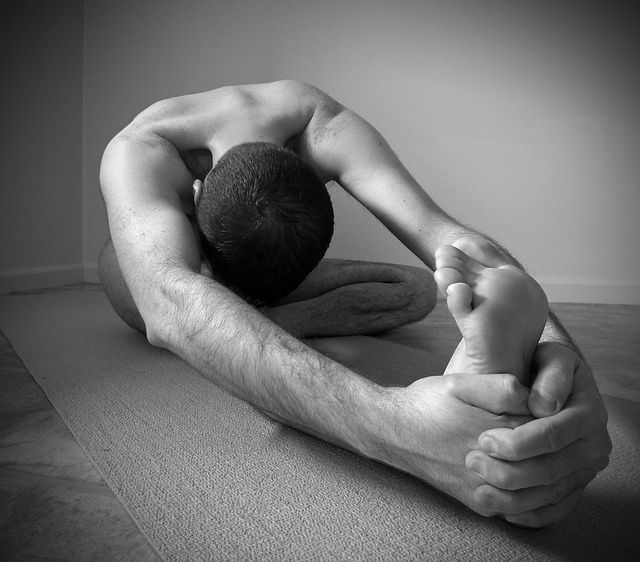
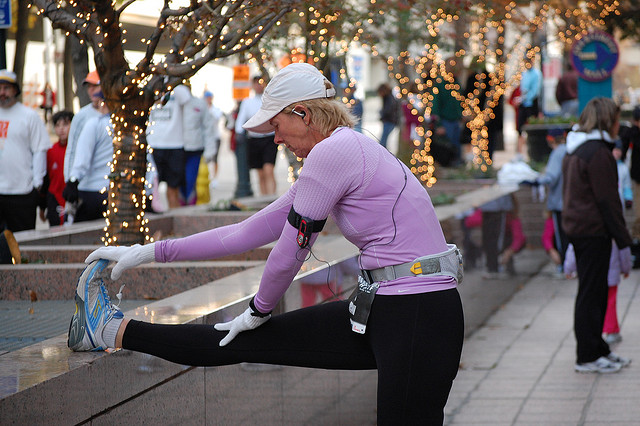
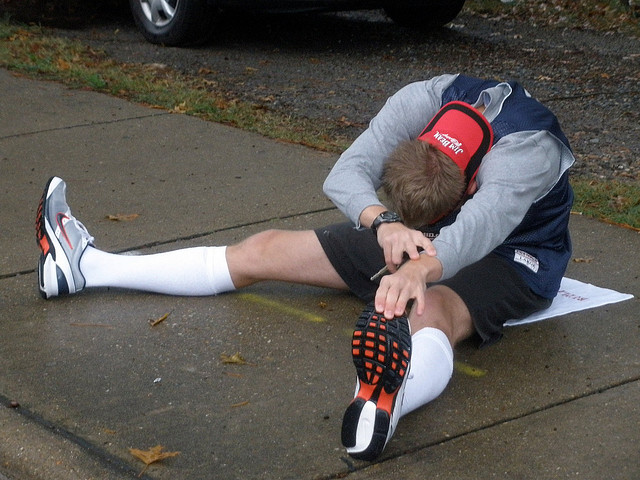
Place your foot on a table (or something similar) and lean into your stretch, making sure that you keep the leg straight and your chest upright. Try to take the stretch as far as you can in comfort and hold as you relax into it; this should enable you to feel how tight your hamstring is.
To get the best and most effective results you should be aiming to stretch from your hip rather than your shoulder and you should feel a gentle, pain-free pulling at the back of your leg. Try to perform 3 sets, of 10 seconds duration, once or twice a day.
This exercise is designed to stretch the muscle fibres near to the knee joint and provide a little elasticity to the healing tissues of your hamstring. At this early stage of recovery it is not designed to increase the flexibility of your muscle; so remember to just take it easy to begin with.
Bent Leg Stretches
In order to target muscle fibres that are closer to the hip, you should perform this exercise whilst lying on your back, keeping your leg slightly bent and pulling your leg towards your head until a gentle stretch is felt at the back of your leg.
Again, perform 3 sets of 10 seconds, once or twice every day. Once you have done this, pain free, for a minimum of three days, you can then move on to more advanced stretching techniques.
Stage Three РThe Flexibility Check
Though similar in technique to stage two, the aim of this stage is to try and improve your injured legs range of motion so that it returns to something like normal, or matches the range of your non-injured leg.
As I mentioned last time, this is the remodeling phase of your recovery and collagen is being laid down to repair your muscle following your strain. You really want this collagen to be neat and tidy, to limit both the damage done and the possibility of a recurrence of your injury, so be sure to continue with both the straight and bent leg stretches until you feel that both of your legs have a similar range of motion and flexibility.

Stage Four РDynamic Stretching
The dynamic stretching stage involves you swinging your leg gently into a stretch position. Being sure to keep your leg straight and relaxed at all times and not to force the stretch, start to swing your leg as high as you can in comfort.
At this time it is also recommended that you begin cycling exercises whilst lying on the floor. Simply lie on your back and support your hips in the air with your hands as you make a cycling motion with both legs. When you can do these exercises for 2 days with no pain you are ready to continue in a similar style in stage five.
Stage Five РA More Flexible Stage Four
Stage five will see you undertaking the same exercises as the previous stage, but with the express purpose of working towards a more equal flexibility in both of your legs.
You should now be capable of doing all of the dynamic stretches with no pain at all and, when you feel that both legs can operate with equal flexibility, you can move to the final stage of your rehabilitation.
Stage Six РThe Final Stage
At this time during your recovery you should be able to begin dynamic walks. This involves you walking forwards whilst kicking the straight leg as high as is comfortable with each step; the purpose of this is to ensure that your muscle receives a dynamic stretch.
These types of stretches should be performed within the pain free range of motion and should always be controlled and not forced. Again you should try and perform 3 sets of 10 repetitions, but it is only necessary to do this once a day.
Once you have got through at least 3 days of these exercises without pain and completed all of the stages pain-free, you should have equal flexibility in both legs and have a much repaired hamstring that is ready to go on to more advanced activities.

And Finally…
After your pain and swelling are under control and you have re-acquired a full range of motion and flexibility, you should look into undertaking a gradual strengthening program (which I will talk about next time).
When you have an adequate return in your strength, you can then seek to return to your desired activity or sport; ensuring that you only return gradually to full blown training.
Remember that, as I said, everyone is different and will recover at different speeds. These steps are just a guideline to recovery from your hamstring injury and you may need to seek further medical advice from a professional if your problem persists.
It is also worth noting that an early rehabilitation program doesn’t necessarily mean that you will return to your sport any quicker. A recurrence in your injury can be prevented and is most definitely avoidable if you ensure that you return at the right time.
Re-injury is very common and will no doubt prolong your recovery. Your doctor or therapist should inform you early in your rehab program about the risks of re-injury and how returning to the sport you love too soon may even increase the risk of permanent damage so don’t take any unnecessary risks.
A full return is usually only possible following a return to maximum flexibility and optimal strength; and that all depends upon the severity of the injury. I know that the rehabilitative process can sometimes be as painful (if not more so) mentally as the injury was physically, so be sure to follow the advice of your doctor, physician or medical professional as best you can and you should be back to your best in no time.
Next time I will be discussing the best stretching techniques to employ later in your recovery in order to improve the stability, strength and flexibility of your injured hamstring. In the meantime, if you have any tales of woe regarding injury you would like to share with us, or just want some helpful advice and tips on what to do to help in your rehabilitation, just give PhysioRoom a shout on Twitter or Facebook, or email me at [email protected] and I will see if I can help.
Take a look at our wide range of great quality hamstring supports.
Till next time, stay happy and safe stretching people!
(For the first part of my hamstring investigation click – here)


